How to Photograph Basketball
Basketball is a great sport to photograph, but it is very different from field sports. Instead of happening halfway across a field, the action will be right in front of you. Scoring is frequent and athletes’ faces aren’t obscured by helmets or face guards, so their emotions are more visible.
Shooting Positions
Since there are only a handful of shooting positions on the court, photographers are typically assigned a spot by the host organization. That being said, seating is sometimes on a first-come, first-serve basis. It is important to know this before the game so you can mark a spot if needed.
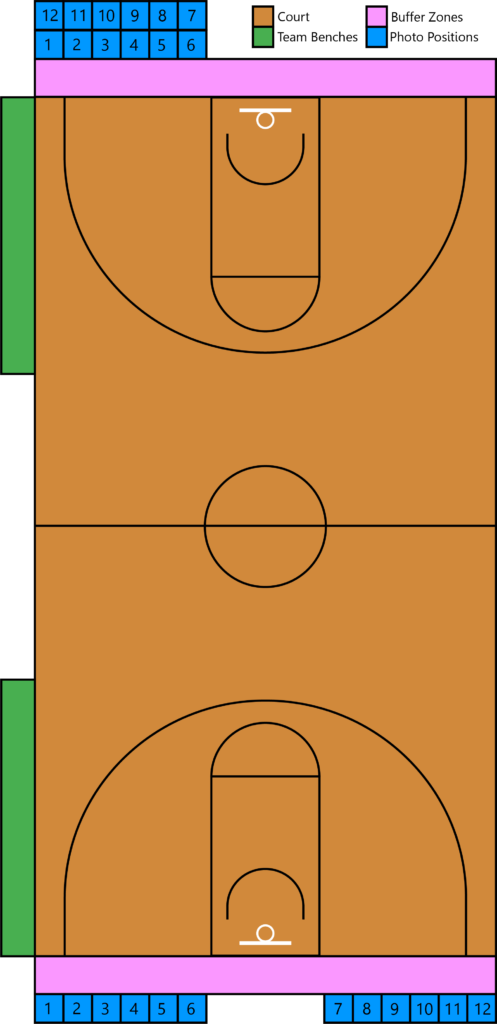
Fig. 1
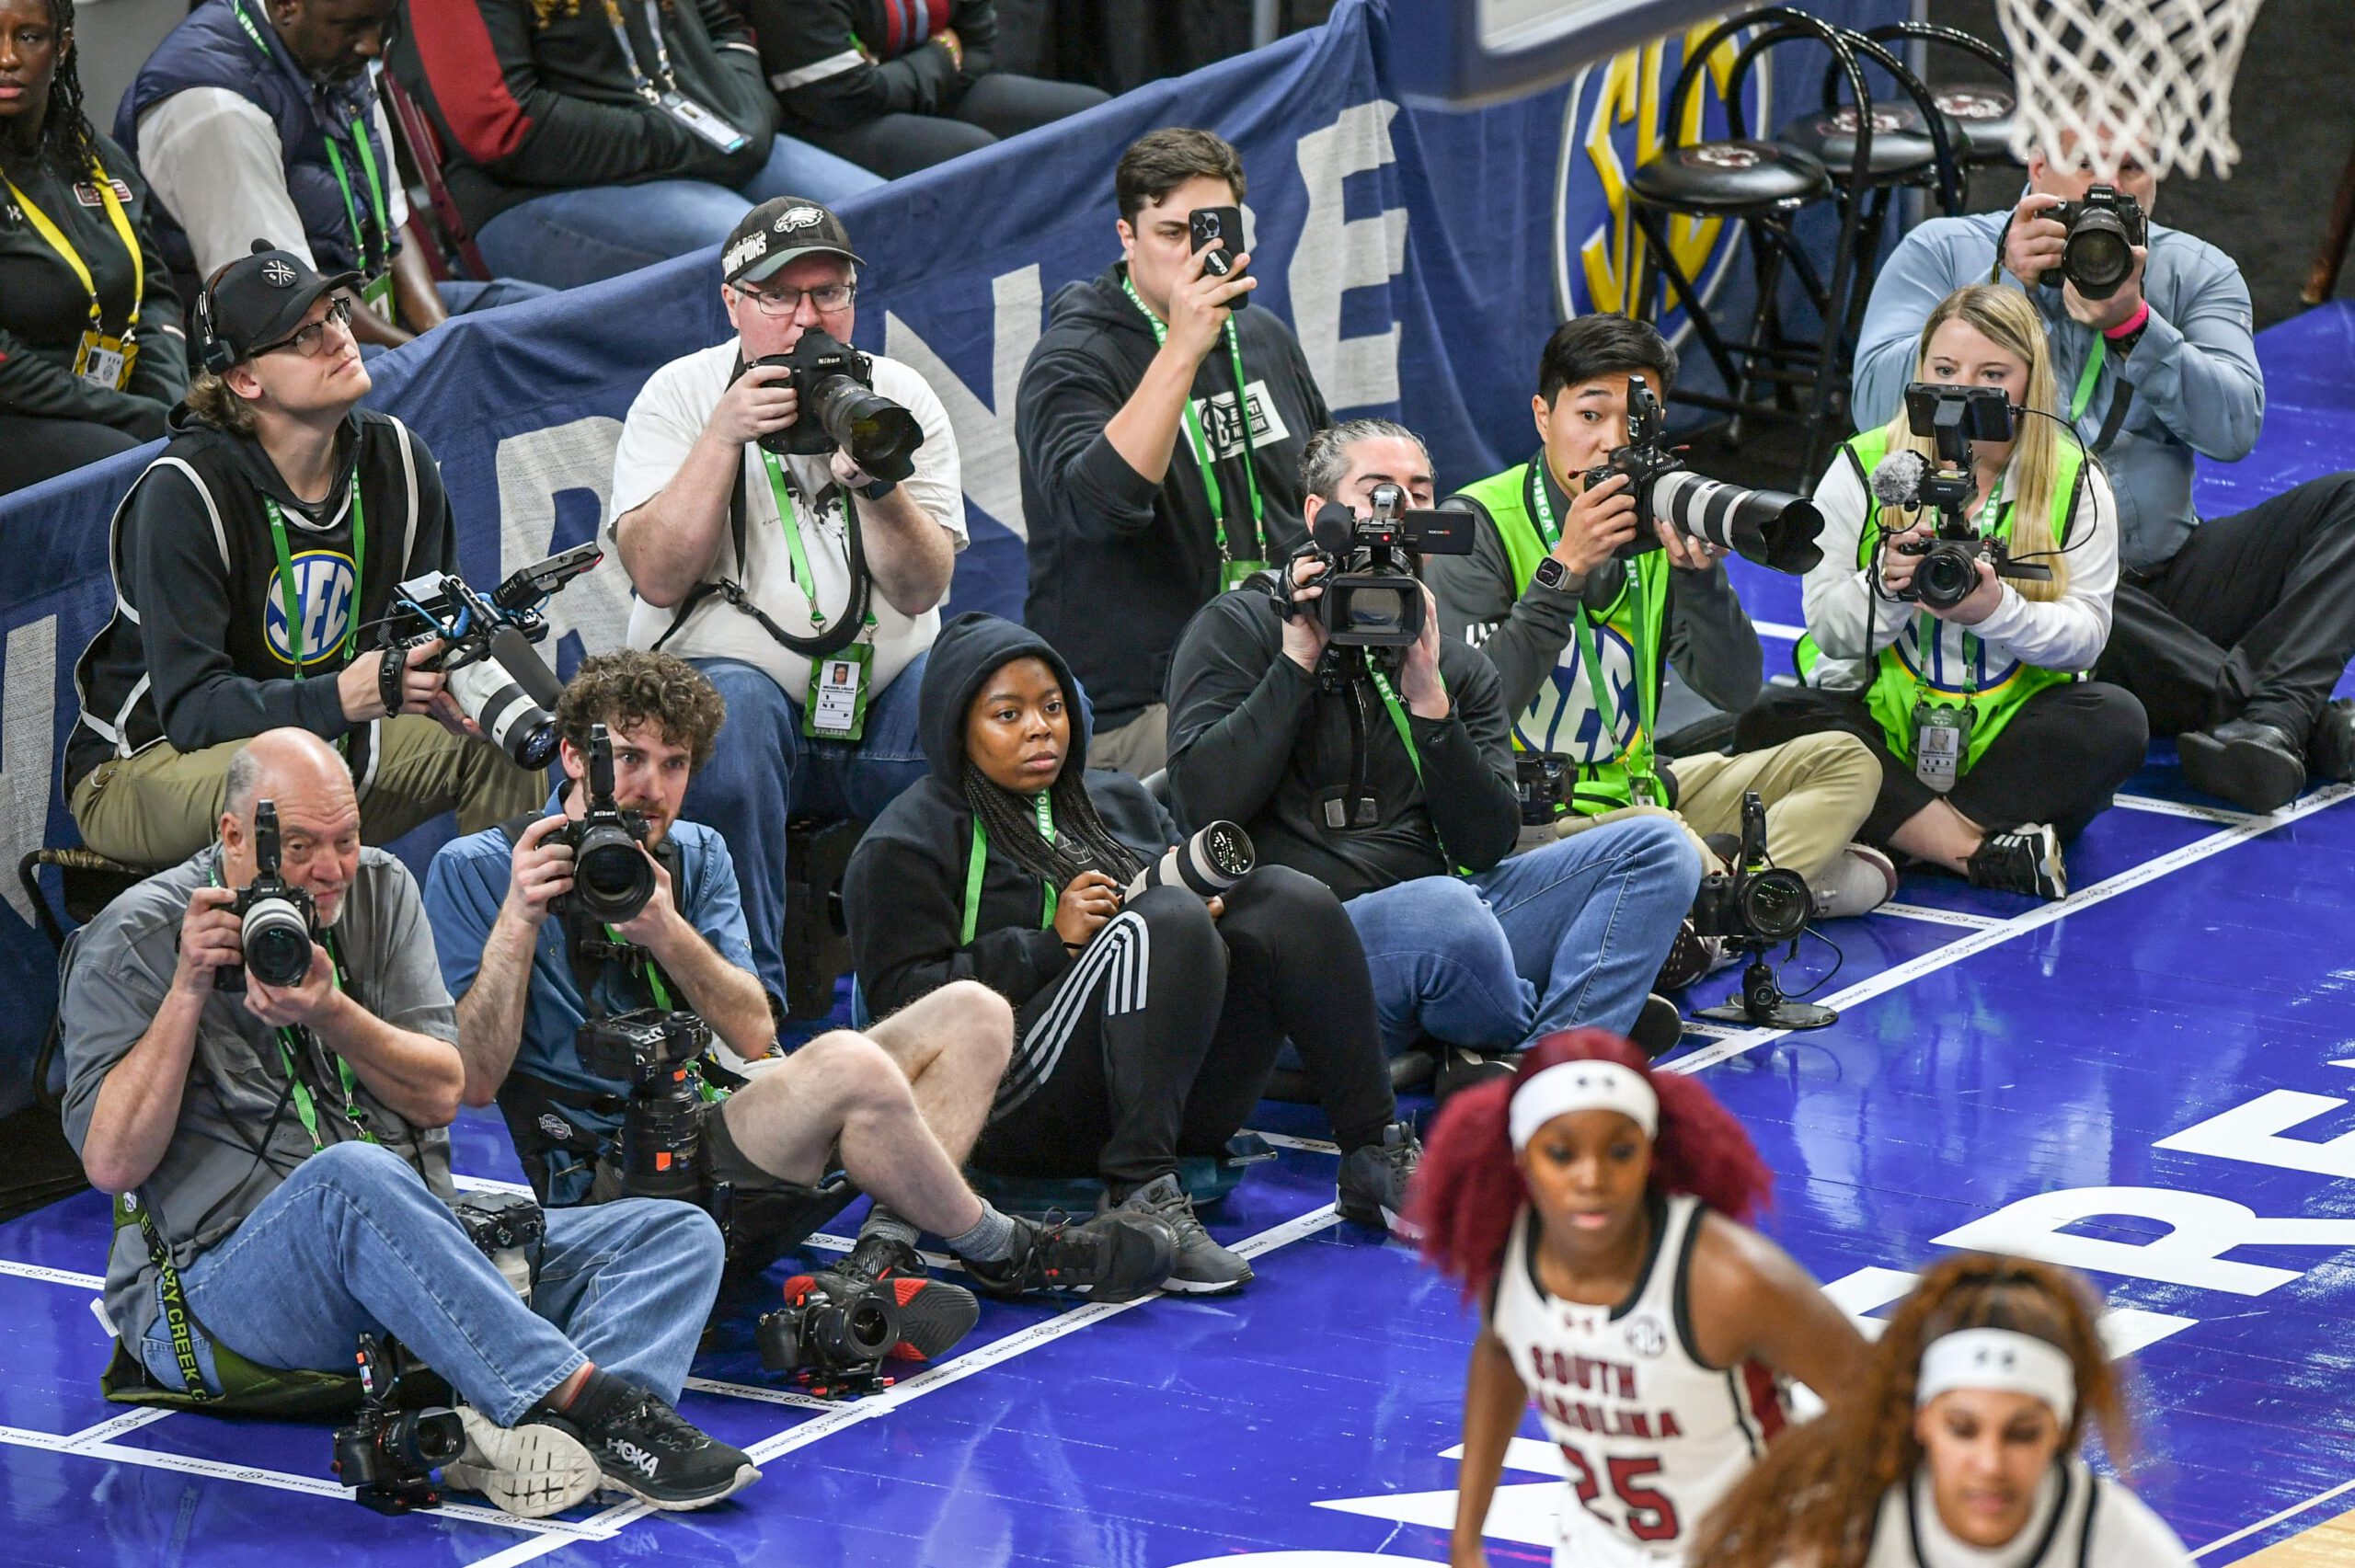
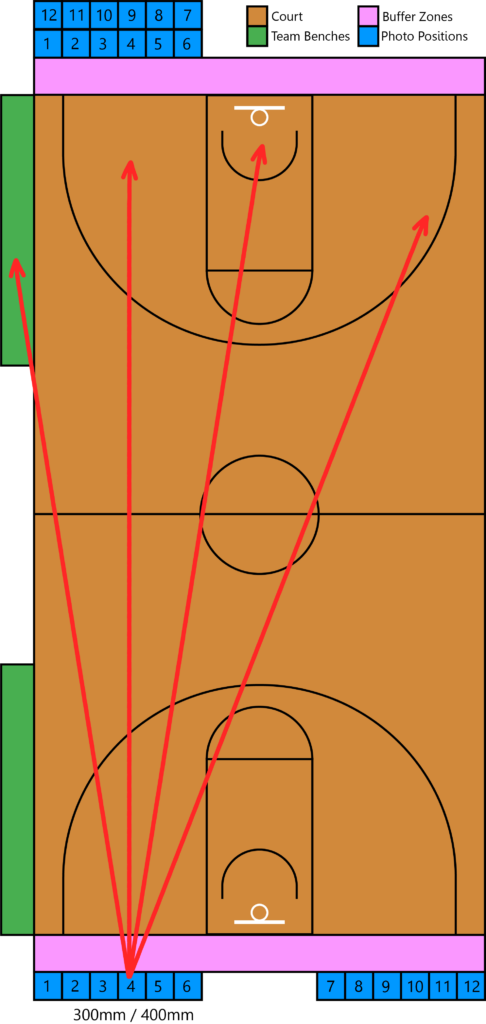
In Fig. 1, you will see two of the most common seating arrangements, two rows (top) and two sides (bottom). At a game, each end of the court should have the same seating layout, either two rows or two sides. There is usually a printout of the seating arrangements posted in the photo workroom. Img. 1 shows a real-world example of the two rows setup.
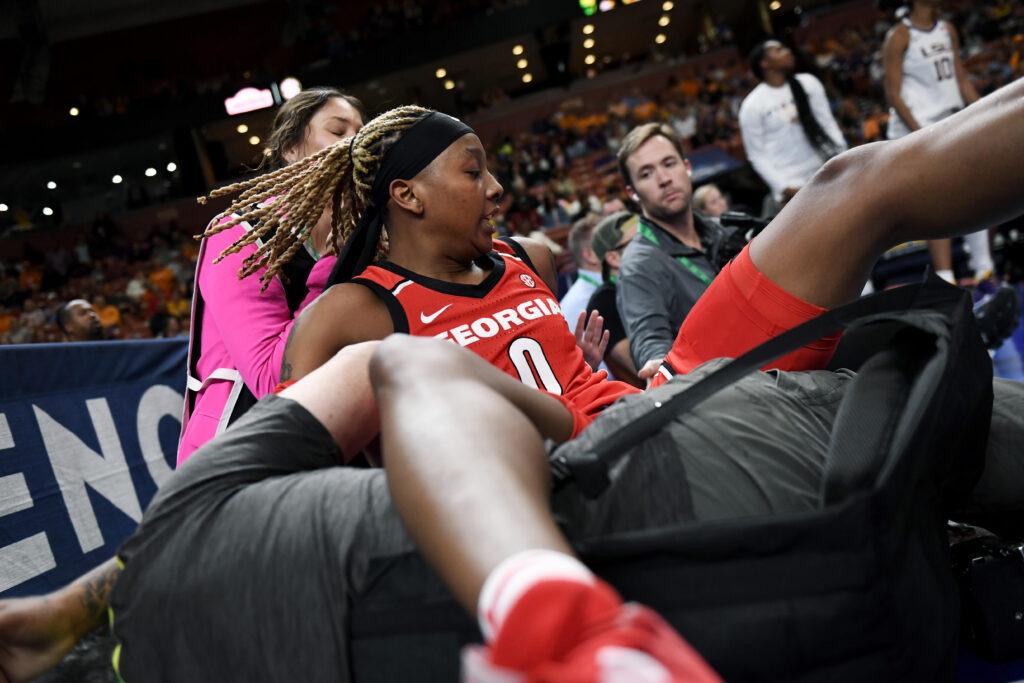
Fig. 1 also includes approximate locations of the team benches and buffer zones. The buffer zone is a section added between the end of the court and the stanchion, photo positions, and cheerleaders or band. This area is designed to help prevent players and officials from colliding with people and objects off the court. While the buffer zone does help, you should still be vigilant for players, officials, and balls that might exit the court, as shown in Img. 2 below.
Lens Choice
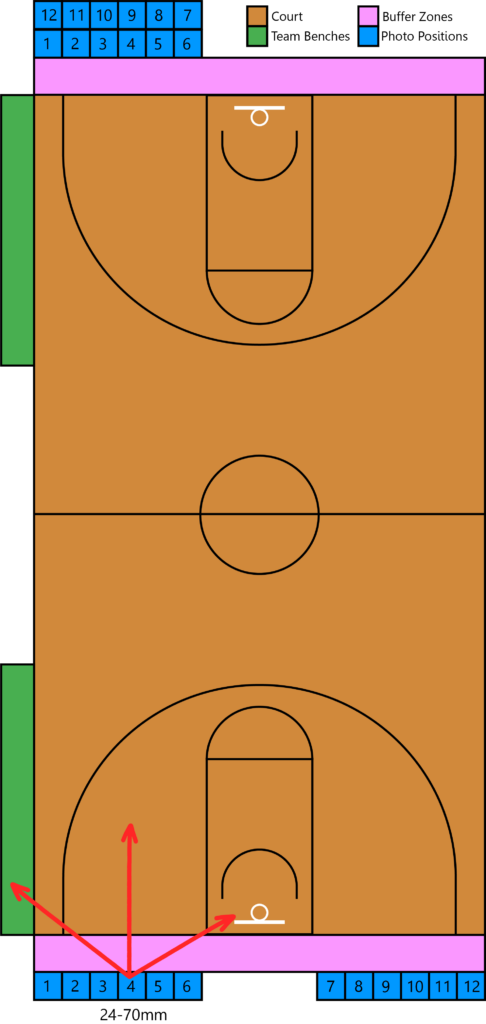
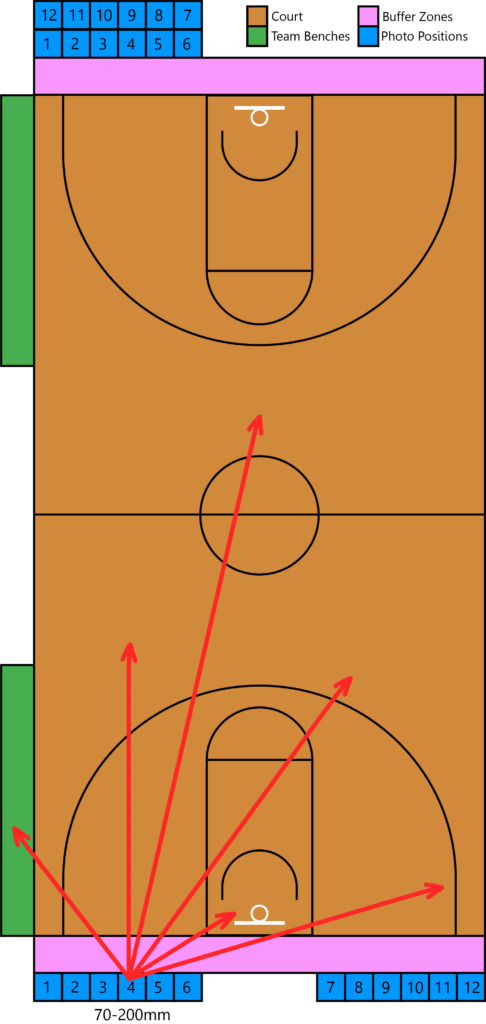
When covering basketball, the three main lenses you use are a 24-70mm for wide shots and close quarters plays, a 70-200mm for most shots at the close end of the court, and either a 300mm or 400mm for covering the far side of the court. See Fig. 2, 3, & 4 (next page) for a general idea of the reach each lens will have. As you cover more games, you will begin to recognize when a specific lens will be appropriate for the given situation. Once you understand the fundamentals of which focal lengths are necessary, feel free to branch out and try different lenses.
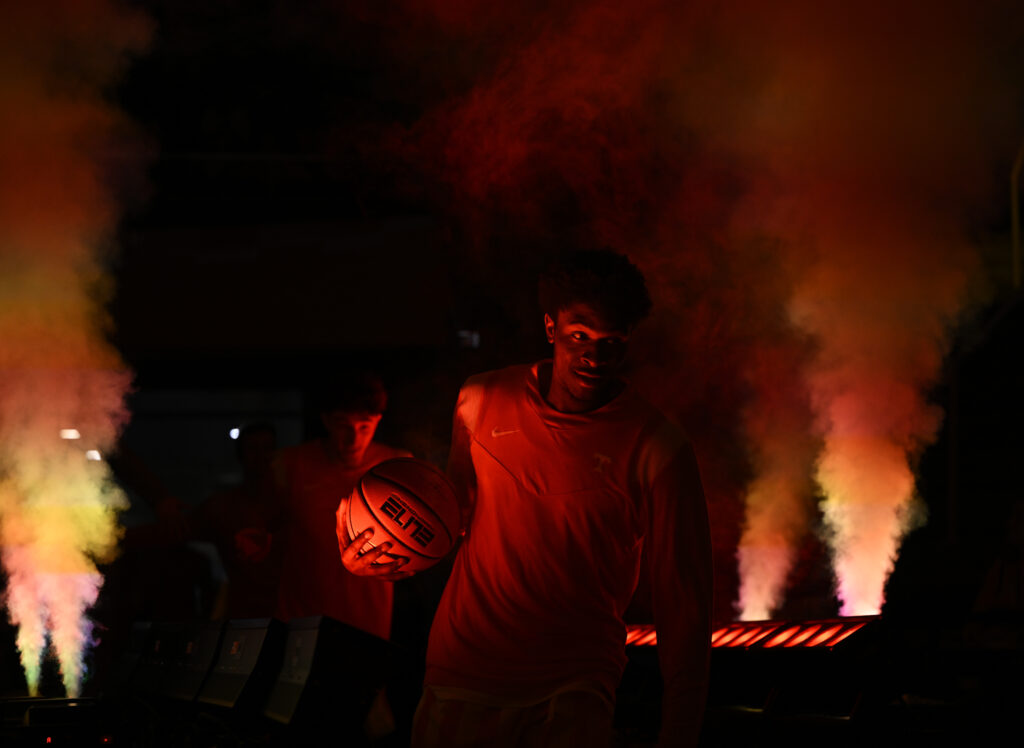
There are a handful of photos, which will be discussed below, that you will capture at each basketball game; these revolve around action and reaction. Beyond this, always be on the lookout for other moments as they will help fill out your gameday coverage. Shooting warmups, player introductions, and post-game celebrations will give a more rounded coverage of the event. Img. 3 was taken as the players ran onto the court before the game. The team had smoke machines and colored lights, creating a path to the court that became visually interesting and unlike anything else from the rest of the game.
Action
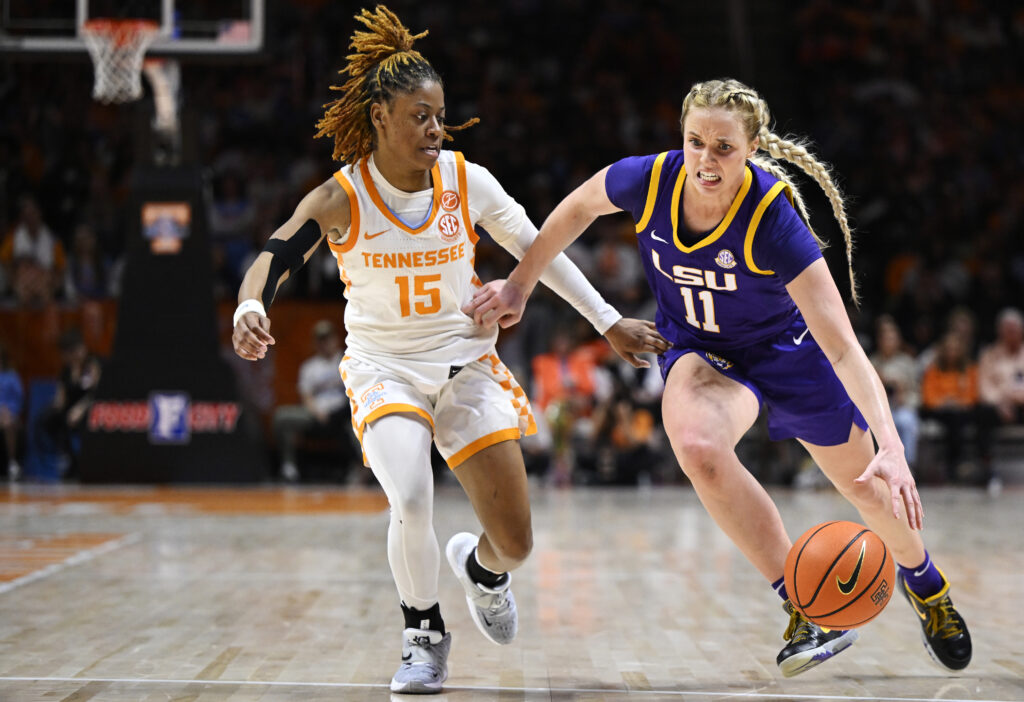
Layups, rebounds, dunks, dives, and dribbles are a few of the action photographs you will encounter while covering a basketball game. Most game action tends to happen within or around the three-point arc. Plays such as layups, dunks, and rebounds happen in the immediate area of the hoop, while drives to the basket bring the ball from the arc to the hoop.
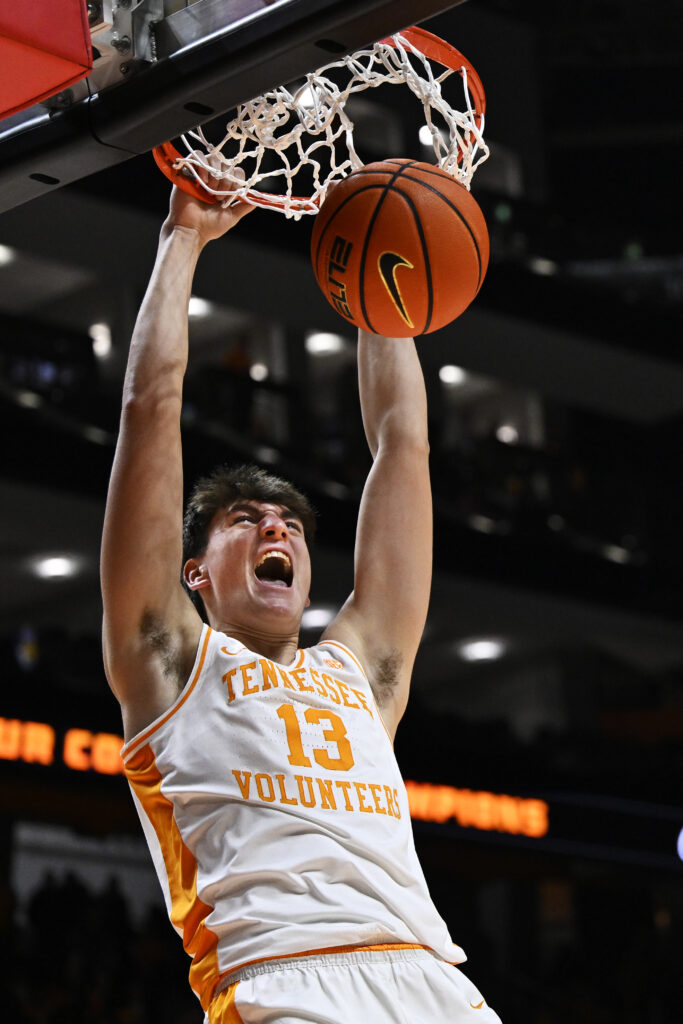
Since these plays move the ball quickly from the three-point arc to the basket, having a 70-200mm is incredibly useful. Utilize the zoom range of a 70-200mm to easily track players as they drive the ball to the basket (Img. 4) for either a layup or dunk (Img. 5). Shoot through the play because if they miss the shot, there will be a rebound attempt by both teams. Drives to the basket don’t always occur; the team may have a strong three-point shooter, or they could stop to take a jump shot inside the arc. Watch for each player’s strengths as the game progresses so you can anticipate what they are likely to do with the ball.
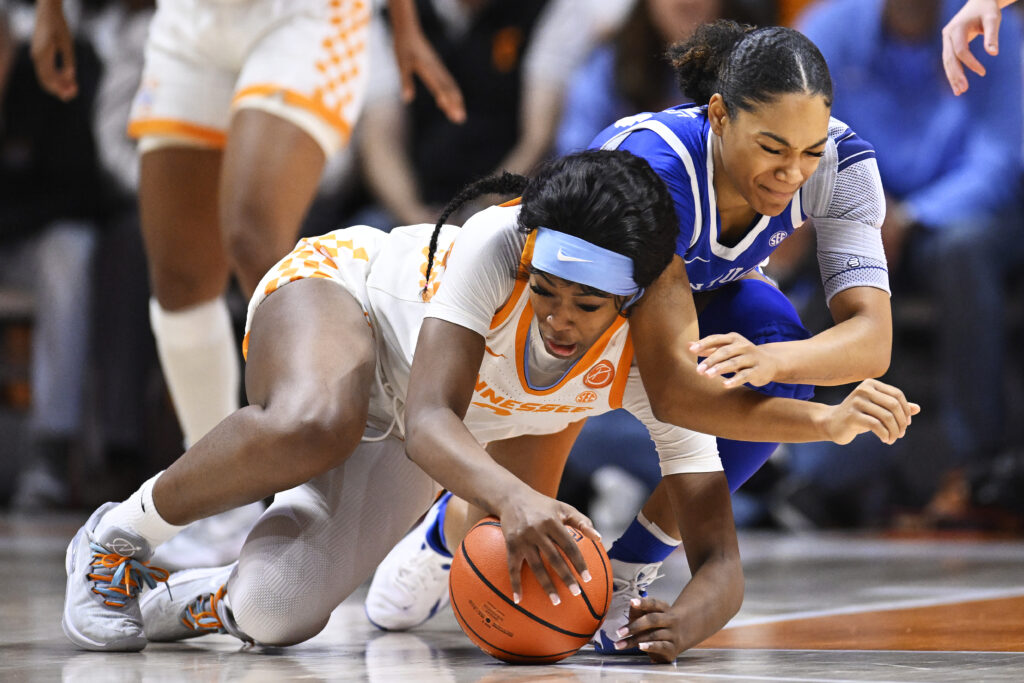
If the ball is knocked out of a player’s grip or ricochets off the rim, both teams are likely to dive for it and wrestle to gain possession. Img. 6 shows what this looks like when shot with a 400mm from the other end of the court, but these dives for the ball can happen anywhere.
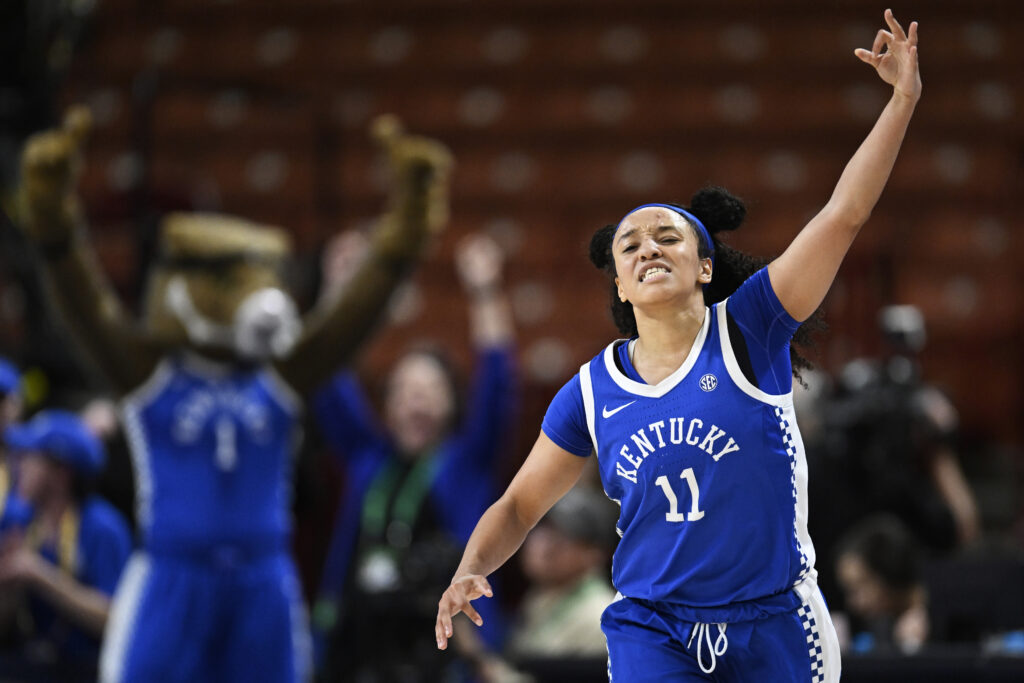
Reaction
Layups, rebounds, dunks, dives, and dribbles are a few of the action photographs you will encounter while covering a basketball game. Most game action tends to happen within or around the three-point arc. Plays such as layups, dunks, and rebounds happen in the immediate area of the hoop, while drives to the basket bring the ball from the arc to the hoop.
Since these plays move the ball quickly from the three-point arc to the basket, having a 70-200mm is incredibly useful. Utilize the zoom range of a 70-200mm to easily track players as they drive the ball to the basket (Img. 4) for either a layup or dunk (Img. 5). Shoot through the play because if they miss the shot, there will be a rebound attempt by both teams. Drives to the basket don’t always occur; the team may have a strong three-point shooter, or they could stop to take a jump shot inside the arc. Watch for each player’s strengths as the game progresses so you can anticipate what they are likely to do with the ball.
If the ball is knocked out of a player’s grip or ricochets off the rim, both teams are likely to dive for it and wrestle to gain possession. Img. 6 shows what this looks like when shot with a 400mm from the other end of the court, but these dives for the ball can happen anywhere.